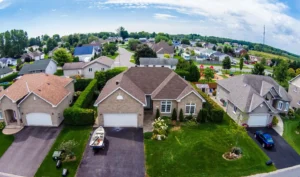
Vinyl has become the top choice for homeowners when it comes to siding due to its numerous advantages. Its abundance of color options allows for a perfect match to enhance curb appeal. Along with its durability and low maintenance, vinyl is also an energy-efficient and eco-friendly long-term investment. It is also a cost-effective option, especially when hiring professionals for installation. However, this does not mean sacrificing quality or settling for a cheaper product.
How much does it cost to have a professional contractor install vinyl siding?
Contractors generally charge between $2.50 and $10.75 per square foot for installing vinyl siding, depending on the type chosen. This means that for a 1,000-square-foot house, the overall cost would range from $2,500 to $10,750. However, for a bigger residence with 4,000 square feet, the cost would significantly rise to between $10,000 and $43,000. While there is potential for negotiation within these figures, individuals trying to cut costs may not be pleased with these prices.
You can be sure that putting money into vinyl siding will usually lead to a beneficial outcome. If you have basic carpentry abilities, it may be worth considering DIY installation as a way to save money. This option could potentially cut the total cost in half and allow for more expensive vinyl siding options within your budget. With that in mind, let’s delve into some helpful tips for successfully installing vinyl siding.

Advice for Installing Vinyl Siding
By following these recommendations, your DIY vinyl siding installation will be a smooth experience, producing a home exterior and workmanship that you can be proud of.
Select the wider starting strip
To ensure proper vinyl siding installation, make sure to use a starter strip positioned at least 1 inch below the top of the foundation. This not only protects against snow and rain, but also helps prevent pests. Remember that starter strips come in two sizes- 2.5 inches and 3.5 inches- so opting for the wider option is ideal for a lower starting point for the siding.
Apply an upward force while driving the nail with the hammer
Ever wonder why vinyl sidings can fail? The main cause is when the panels become loose and get blown away by strong winds, ending up either in the middle of the street or your neighbor’s property. To avoid this problem, it is recommended to apply some upward pressure while nailing down the pieces. This method ensures that the panels stay firmly in place. Just be cautious not to use too much force, as it may cause the nail flange to break.
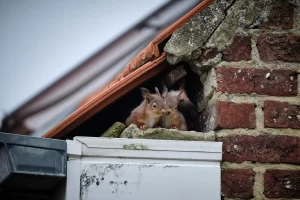
Keep pests away from your vinyl corner posts
While vinyl siding offers numerous advantages for any household, it may also invite unwelcome visitors like mice, bees, and other critters to inhabit your vinyl corner posts. To prevent this issue, be sure to cap each post prior to installation in order to deter these pests from making themselves at home.
Here is a sequential guide on how to achieve this task:
● Reduce the length of the J-channel on the post by a few inches.
● After folding back the remaining flaps, gently tap them with your hammer to create a crease.
● Ensure the flaps are properly notched to securely fasten them against the wall.
● Take note of how posts can crack in cold conditions. Therefore, either place them in the sunlight or bring them indoors prior to engaging in this procedure if the weather is chilly.
Overlap the top J-channels with the side J-channels
While the top J-channel may not offer complete protection against rainwater infiltration through windows and doors, the issue can be avoided by utilizing the side J-channels. To ensure proper protection, one can simply create an overlapping flap using the top channel.
Nail the fundamentals
For sheathing that is not foam-based, utilize 2-inch galvanized roofing nails to fasten your vinyl siding. Be mindful not to drive the nails in too tightly so that the panels have room to shift. This will prevent bubbling during higher temperatures. Remember to aim for each stud, as only securing to the sheathing can result in loose nails due to the siding expanding and contracting.
Be sure to use a vinyl-siding blade
Having the appropriate tools is crucial for various tasks. For example, when self-installing vinyl siding, a vinyl siding blade is essential. Attempting to cut the siding with a regular wood blade on a circular saw can lead to breakage, leading to financial loss and potential dangers. These specialized blades are easily accessible and reasonably priced at most home improvement stores. However, even with the correct tool, there is still a possibility of chipping while using a siding miter saw. In such situations, try pulsing the saw carefully in reverse through the siding.
Ensure the window bottoms are flashed
Before installing the side J-channels, position a length of felt paper flashing at the bottom corners of the window. Verify that this flashing covers the row of siding beneath the window to prevent water from entering. This enables proper drainage through the designated weep holes situated at the top of the siding for any water that may accumulate in the J-channels.
Keep an eye out for overlaps
It is important to remember that when installing vinyl siding, a one-inch overlap between panels is recommended. However, on hotter days it may be necessary to increase the overlap by an additional ⅜ inch in order to prevent contraction and maintain a pleasing appearance. For best results, start installing the siding at the back corner of the house on both sides to ensure that seams are not visible from the street. Incorrect lapping can greatly impact the overall curb appeal of your home. Be sure to also overlap seams on the front and back of the house so they are not visible from decks, patios, or front doors.

Start installing longer panels first
When putting up vinyl siding around a door or window, begin with the side that needs longer panels. Remember that shorter panels are more pliable and can stretch easily. Therefore, make sure to measure up to the top of the window before nailing the final pieces on the shorter side. This guarantees that both sides will be even in height.
Learn more about vinyl siding installations from a professional
If you want to take on the project of installing vinyl siding yourself, why not team up with experts who can offer valuable tips and support? Contact AGR now for assistance with your DIY venture.