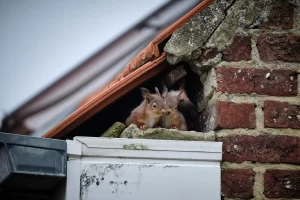
Rooftop vents and chimney flues present readymade entryways for squirrels, raccoons, birds, and other pests. It’s also easy for water, leaves, twigs, and other debris to blow in.
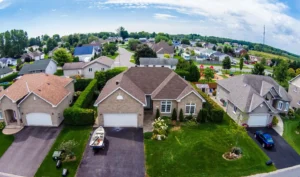
Omaha homeowners often find themselves with unwanted guests or an inexplicably dirty home without realizing that a tiny gap in the attic could be responsible.
You can protect your home by installing vent and chimney guards. Vent openings can be protected from the outside with rooftop vent guards or from inside the attic with hardware cloth. Chimney openings can be covered with something called a chimney cap.
These products are constructed from stainless steel or other strong metals that animals can’t chew or get through. They use heavy-duty mesh to maintain good airflow while blocking off any holes.
Hardware cloth can be applied from the inside, but you will need to get onto your roof to install the vent guards and chimney cap. Always be careful when climbing up on the roof or using a ladder to get to your attic’s ceiling. Use work gloves, non-slip shoes, a notebook, a marking pen, and power equipment to get things done quickly and safely.
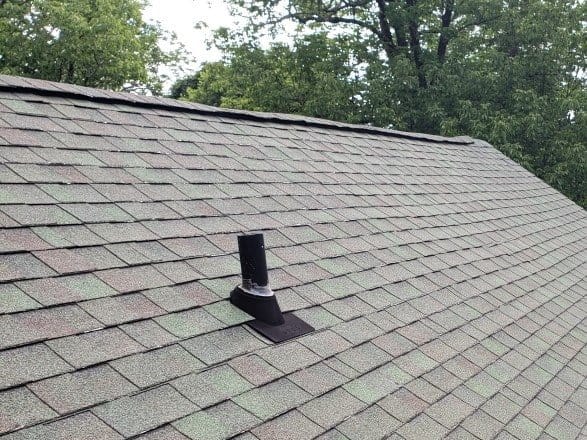
How to Install Rooftop Vent Guards
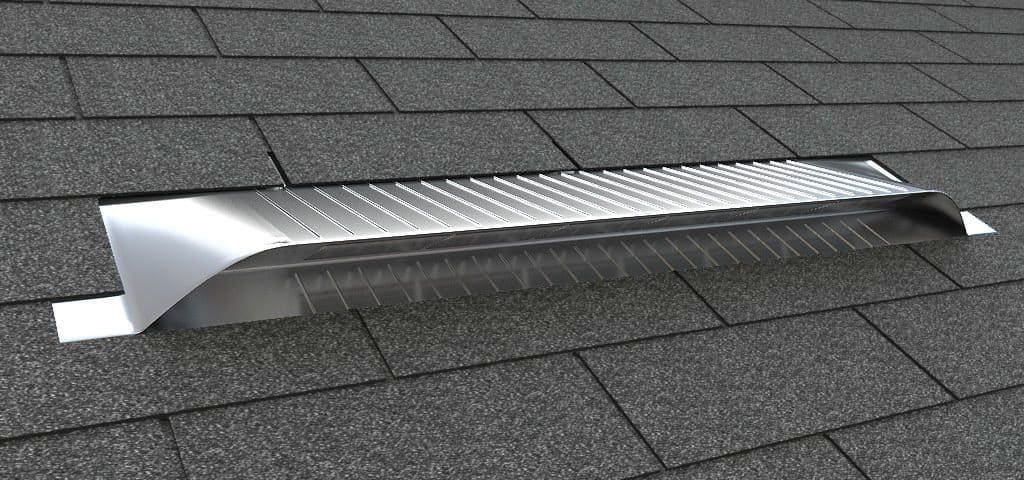
Roof vent guards are strong stainless steel mesh cages that are secured on the roof directly over a vent. They can be installed with a few simple steps.
- Measure the vent’s height, width, and length
- Purchase an appropriately sized vent guard from a hardware store or wildlife controller
- Place the guard over the vent and nail or screw it in
How to Screen Off Attic Vents
Hardware cloth is a stainless steel mesh cloth used to screen off vent openings on the inside. This process can be a little more work than installing vent guards.
- Find all the venting, pipes, and ductwork that go through the roof
- Measure each area with at least 1 inch to spare and find the total amount you need
- Purchase hardware cloth with mesh that’s 23 gauges or higher (the gaps are ¼” and too small for pests)
- Use snips – metal cutting scissors – to cut the pieces you need
- Put the mesh over the holes and fix it in place with roofing nails
How to Install Chimney Guards
Chimney caps are usually constructed from stainless steel but can also come in copper, aluminum, and other metals. Stainless steel and copper caps are considered the most durable. So, consider purchasing the stainless steel option if you have the choice between a lower costing aluminum cap versus a higher costing galvanized stainless steel cap.
A chimney cap’s top is solid to protect against rain, weather, and debris, while the sides are meshed to maintain good airflow and let the smoke out.
Chimney caps are installed over or into the open chimney flue. Like the flue, the cap can be square, rectangular, round, or oval. Most chimney flues extend into the air, but some are level with the chimney’s structure.
Chimneys can also have multiple flues. If that’s your case, the cap is installed directly onto the chimney crown, which is the final slab of concrete or cement on top of the chimney. You can also choose this style of cap if you prefer the look.
Measure the Chimney Flue
Start by taking the chimney flue’s dimensions. If you have a multi-flue chimney, you will also need to measure around the chimney crown.
- Single Flue: measure the flue’s length, width, and height
- Round Flue: measure the flue’s inner diameter
- Oval Flue: measure the flue’s outer diameter at the longest and widest parts
- Flush Level Flue: take the flue’s measurements, along with the length and width of the crown
- Multiple Flues: measure the combined length and width across the flues, the height of the tallest flue, and the length and width of the chimney crown.
Purchase Your Supplies
Next, buy a chimney cap that fits the flue’s dimensions. The chimney cap’s product description should include what flue size range it fits. Always stay within this range.
There are several types of chimney caps to fit different flue shapes and structures.
- Multi-Flue: buy a top-mounted cap that’s longer and wider than the flue span, doesn’t overhang the crown, and is at least 6 inches taller than the highest flue
- Extended Flue (Any Shape): buy a matching cap that attaches to the outside with clamps or screws
- Extended Round Flue: buy a clamp/screw attached or a slide-in cap
- Metal Lined Round Flue: buy a slide-in cap
- Flush Level Flue (Square, Rectangular, or Oval): buy a matching cap with legs or brackets
- Flush Round Flue: buy a slide-in cap
You will also need:
- high-temperature silicone adhesive
- an impact driver or hammer drill
How to Install a Single-Flue Chimney Cap
Single flue caps are installed by sliding them over the flue. Caps that slide into the flue are easy to install. If your cap slides over the outside, it will need to be secured with screws.
To install a slide-in single flue cap:
- Push it down into the chimney flue until tight
- Make sure you leave at least 6” of space between the top of the flue and the cap
To install a bracketed, screwed, or clamped cap:
- Slide the cap over the flue and push down until fairly tight
- Leave at least 6” of space
- Use a power drill to tighten the screws into the predrilled holes
- Add high-temperature silicone sealant around the cap’s base
How to Install a Top Mounted Chimney Cap
Top-mounted caps can be used with any kind of flue. If you’re installing this over an extended flue, make sure to leave 6” of headroom.
Top-mounted caps are secured with masonry screws or adhesive. You can add adhesive along the perimeter of a screwed-in cap, as long as you don’t get it in the screw holes.
You will need an impact or hammer drill for this installation.
- Get a masonry bit that’s around 1/8” smaller than the screws
- Place the cap on the crown and position it correctly
- Use a masonry bit to drill pilot holes into each screw hole location
- Use an impact driver or hammer drill to insert the screws
A cap that’s only secured with adhesive is much easier to install.
- Position the cap on the crown
- Lift it slightly and add a strip of adhesive along the perimeter
- Press down on the cap
Have a Roofer Protect Your Home
Not sure if you want to get up on the roof and do this yourself? Ask us to send a team of pro roofing experts over. Contact us today.